Guide to use the Wall Art Tool

See how this artwork could look in your own space. Upload a photograph of the wall where you are considering placing the artwork, then move and resize the painting to find the position that works best.

Your photo stays on your device — it is not uploaded to the website.

Before you take your photo

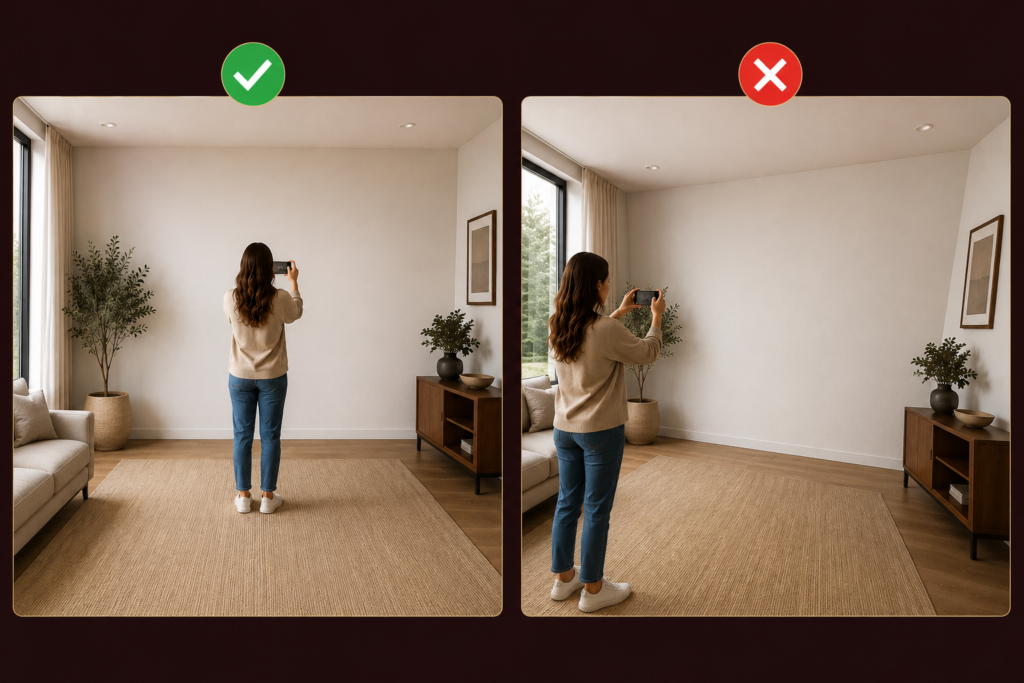
Take the photograph straight-on.
Stand directly in front of the wall and hold your phone or camera level with the wall. The wall should appear as flat and straight as possible in the photograph.

Do not photograph the wall from an angle.
An angled photograph creates perspective distortion, which will make the artwork appear skewed when it is placed on the wall.

Show enough of the wall.
Include the area where you would realistically hang the artwork, together with some of the surrounding furniture. This makes it easier to judge the artwork’s size and position in the room.

Use a clear, well-lit photograph.
Avoid very dark photographs, extreme glare or heavy shadows across the wall.

Photo size:

For the best result, use a photograph at least 1200 pixels wide. A larger, original phone photograph will give you a better result.

Know the artwork's size

Check the artwork’s actual dimensions before positioning it.
The artwork will initially appear at a suggested size on your wall. Use + and − to adjust it, then drag it into position.

For the most realistic result, compare the artwork on screen with its listed width and height and the available wall space.

How it works

1. Upload your wall photo
Select the photograph from your phone or computer.

2. The artwork appears automatically
The artwork you were viewing is placed on your wall photograph.

3. Move it
Click or touch the artwork and drag it to the position where you would hang it.

4. Resize it
Use + to make it larger and − to make it smaller.

5. Reset it
Use Reset if you want to return to the starting position and size.